
Hi Guys ,
This blog is about the Windows 10 Auto Pilot program . This is the way forward . We have been using different technologies for deploying Windows 10 but Microsoft has come up with the Autopilot program which is similar to Apple’s Device Enrollment Program (DEP) for those of you familiar with managing Apple devices in the corporate world.
So the question comes: What is Windows AutoPilot? The official Microsoft definition is as follows:
“Windows AutoPilot is a collection of technologies used to setup and pre-configure new devices, getting them ready for productive use”.
The thinking behind the Autopilot program is that users can take delivery of their new Windows 10 devices and join it to the Azure Active Directory in a matter of minutes without having to complete all the time consuming setup screens which makes the life easy for Admins and users. Also the user does not have to end up being a local administrator on the device, as used to be the case with manual Azure AD Join.
This is mainly a step forward from the traditional way of deploying Windows.We can look the same as the following formula :
Active directory + GPO + Configmgr = Windows deployment completed with all settings required.
Now we can modify the formula by adding MDT and other third party tools but for now we will focus on Windows 10 Autopilot program.
Also to clear the doubts the above mentioned process will remain .But Microsoft has come up with a more simplified way. Modern management is a more simplified approach using cloud-based solutions like Microsoft Enterprise Mobility + Security (EMS), which includes Azure AD Premium and Intune. It’s complemented by cloud services like Azure Information Protection, Office 365 and Microsoft Store for Business. Windows 10 offers the flexibility to respond to these changing requirements, and can easily be deployed in a mixed environment in areas like provisioning, authentication and configuration management.
So Windows Autopilot basically needs following steps to be complete as a solution:
- Prerequisites
- Hardware ID
- Add devices to tenant
- Assign AutoPilot deployment profile
- User turns on device and signs in
Step 1 – Prerequisites
- Devices must be pre-installed with Windows 10, version 1703 or later
- Devices must have access to the internet
- Azure AD Premium P1 or P2 licenses
- Microsoft Intune or other MDM services to manage your devices
- Azure AD configured for Intune autoenrollment .
- Devices must be registered to the organization
Step 2 – Hardware ID
This step involves getting hardware information from your Windows 10 devices and uploading this information to your tenant in advance. This hardware information includes the device serial number, the Windows Product ID and the hardware hash in CSV format. Now there are a number of ways to gather the information and upload.
The main hardware vendors have signed up (or will sign up) to participate in the Windows AutoPilot program. This means that they will provide this CSV for each device that they ship directly to users. There are also plans to allow the vendors to upload this information to your tenant on your behalf.
Now for testing purpose you can also manually gather the Hardware ID by running some powershell commands . You can check the script here . It’s in the PowerShell gallery so you don’t have to download and install it. It installs automatically when you execute it from the PoSH console (run as administrator).
Execute the script: Install-Script -Name Get-WindowsAutoPilotInfo
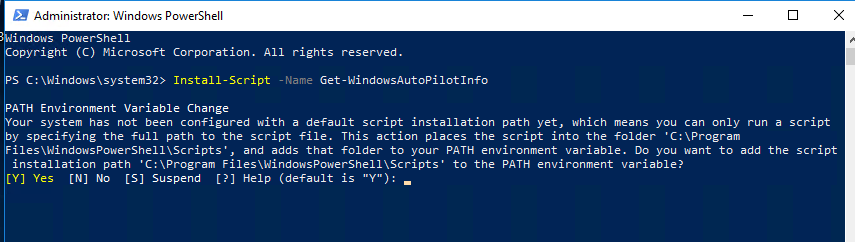
Accept the warning about the path environment variable change.
![]()
Allow the NuGet provider to be installed.
![]()
Allow scripts to be run from “PSGallery”.
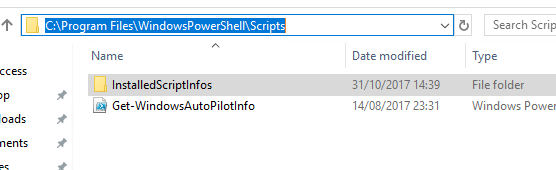
The script is available in C:\Program Files\WindowsPowerShell\Scripts
![]()
Set the execution policy so that you can run untrusted scripts.
![]()
Execute the script: .\Get-WindowsAutoPilotInfo.ps1 -ComputerName <ComputerName> -OutputFile .\ComputerName.csv

The CSV file has been generated and can be found in the C:\Program Files\WindowsPowerShell\Scripts folder.
Step 3 – Add devices to tenant
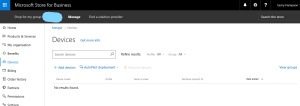
Now the CSV file has been generated and we can add the device to the tenant. We must do this in the Microsoft Store for Business.
Note: Even though we can create AutoPilot deployment profiles in the Intune portal we cannot add devices right at this time. If we want to use Intune profiles we must add devices to the Microsoft Store for Business and sync to Intune.

Select “Manage”.
Select “Devices”. Click “Add devices”. Navigate to the CSV file and add the device to a deployment group when prompted.
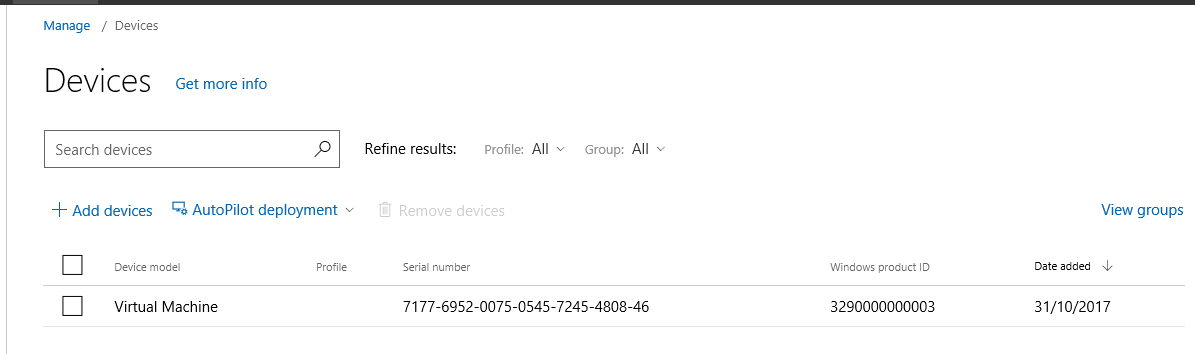
Device is added to your tenant.
Open the MSfB and navigate to Manage > Devices

Click on AutoPilot deployment and choose Create new profile.
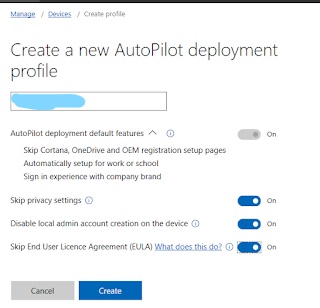
Enter a name for the profile and select your required settings.
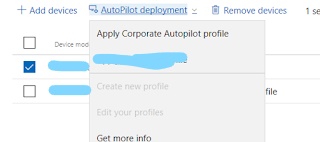
Select a device or a number of devices and apply a profile.
Option 2

Select Device enrollment.

Select Deployment Profiles.

Choose Create Profile.
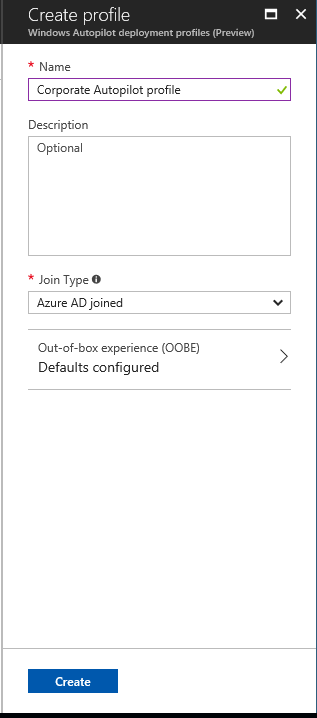
Enter a profile name and choose the join type – Azure AD Joined. Edit the OOBE settings.
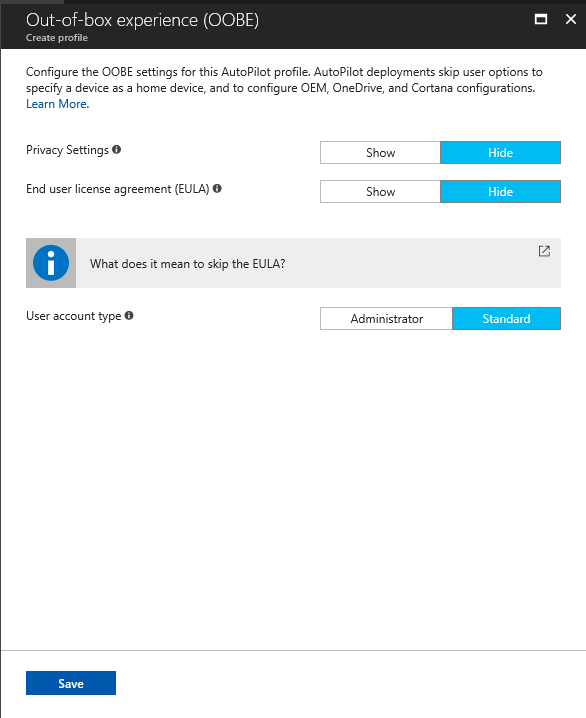
Select your OOBE settings. The options are the same as those in the MSfB.
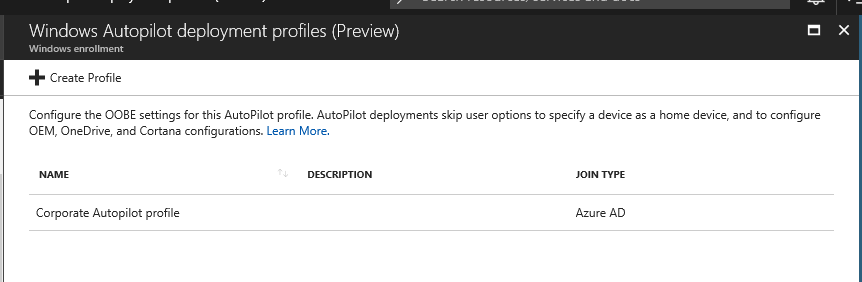
The AutoPilot deployment profile has now been created in Intune and can be assigned to devices. If you have to find these devices in Intune you need to see below.

In the Intune Portal, navigate to Device enrollment > Windows enrollment > Devices.
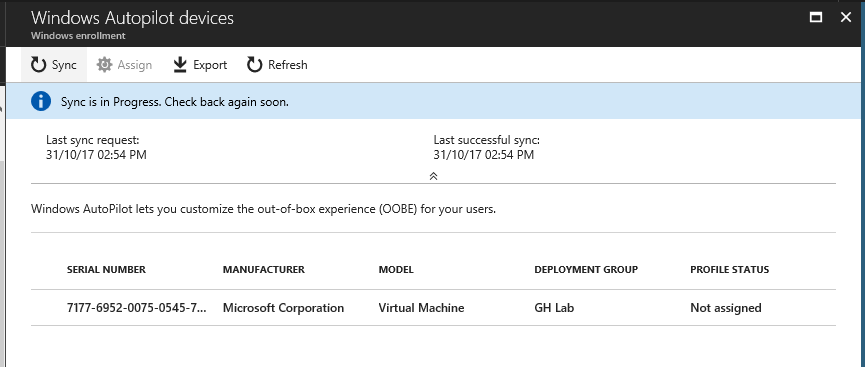
Click Sync to synchronizing devices from MSfB.

Select a device and choose Assign.
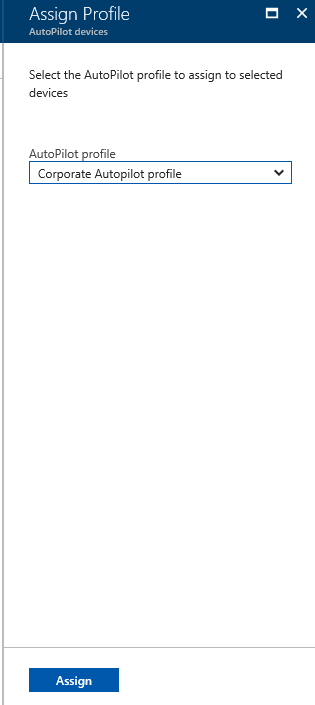
Select the AutoPilot profile you created earlier.
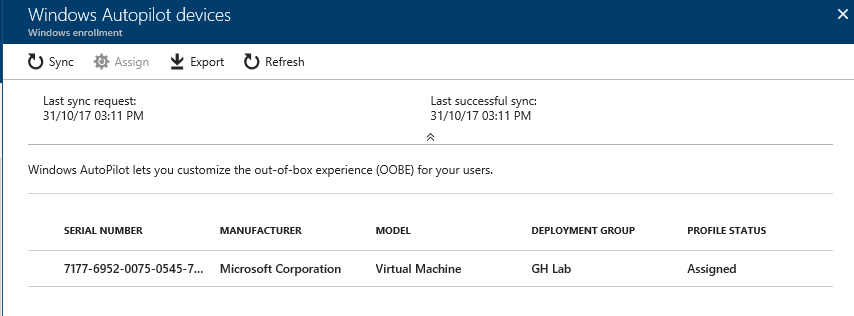
The device is ready to go
Note: There is a change in the new version of Intune for Assigning Auto Pilot profiles:
The devices assignment is now done through AAD groups .We need to create groups in Azure AD and then assign those groups to Auto Pilot profile. Now the groups can be static or dynamic based on the requirement . Dynamic groups are more preferred way of assigning devices to Auto pilot profiles.
Once the device is uploaded to AutoPilot service (Intune), an Azure AD object for that device will get created. The device object created will appear with the serial number of the device until the Azure AD join process is completed for that device. A Dynamic Azure AD group can be created with that AAD device object which can then be linked to the Autopilot profile.

That’s all great for the provisioning piece, but are enterprises really ready for this approach where the user will require Win32 apps to be delivered to them post provisioning. I know Intune is promising to be able to deliver MSI apps, but has anyone started using this approach? how is it working for them?
LikeLike
Hi Arobukay , Microsoft is pushing towards this provisioning piece but as far as adoption is concerned some companies are using it but at this point not too much .
This requires the infrastructure to be in place and once its there this should be a breeze.
LikeLike