
Hello Guys ,
SNS and SQS are messaging services in AWS . SNS is a push based service whereas SQS is a pull based messaging service offered by AWS. Both services have their own unique use cases and based on the requirements in your organisation, one can choose the service or maybe use both services together. Today we will discuss a use case where both services are talking with each other where SNS pushes a message to SQS and we monitor that message in SQS queue.
Below are the objectives of this use case and a diagram to illustrate the same:
- We will create the SNS topic and a Queue
- We will then create a subscription in SNS for the Queue
- We will then ensure the permissions are granted to SNS service to push messages to SQS
- We will then publish a message in SNS and observe it in the SQS console

Step 1 :
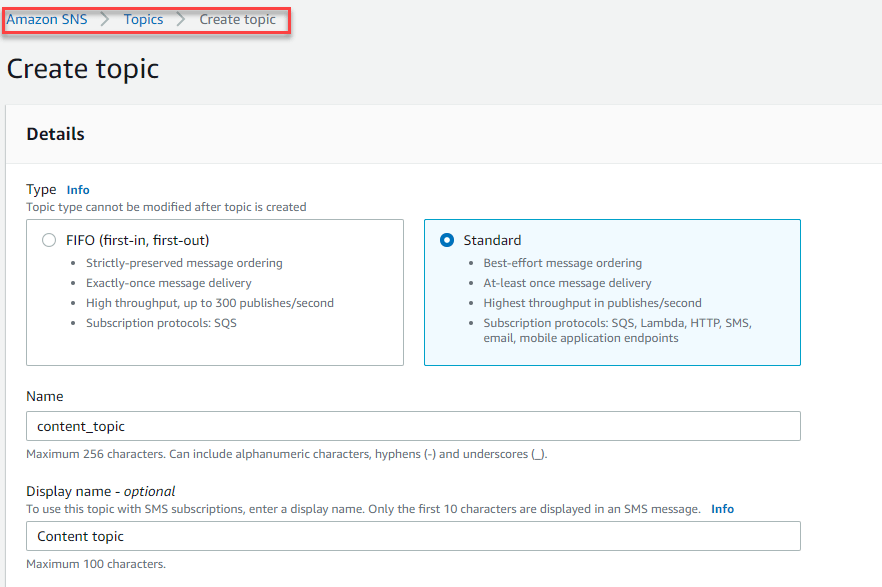
We will browse to the AWS SNS service in AWS console and create a topic as you can see in the image below:
- I have given content_topic name for my topic
- For display i have given Content topic as the display name
Step 2:
We will now create an SQS queue:
In this scenario i will be creating a standard queue with the following configurations:

Below is the JSON policy which you will see in your AWS console. “NNNNNNNNNN” -This refers to your AWS account number,the only addition i have done here is add permission for SNS to send message to SQS.
To edit this policy you will need to click on advanced tab while creating an SQS queue:
- Under the Access policy card select the Advanced radio button for the Choose method option
- Delete the existing JSON from the text area
- Paste the updated JSON from the text editor to the text area (which will be blank at this time)
- Click Create queue button
{
    "Version": "2008-10-17",
    "Id": "__default_policy_ID",
    "Statement": [
        {
            "Sid": "__owner_statement",
            "Effect": "Allow",
            "Principal": {
                "AWS": "NNNNNNNNNN"
            },
            "Action": [
                "SQS:*"
            ],
            "Resource": "arn:aws:sqs:us-east-1:NNNNNNNNNN:content_q"
        },
        {
            "Sid": "Allow-SNS-SendMessage",
            "Effect": "Allow",
            "Principal": {
                "Service": "sns.amazonaws.com"
            },
            "Action": [
                "sqs:SendMessage"
            ],
            "Resource": "arn:aws:sqs:us-east-1:NNNNNNNNNN:content_q",
            "Condition": {
                "ArnEquals": {
                    "aws:SourceArn": "arn:aws:sns:us-east-1:NNNNNNNNNN:content_topic"
                }
            }
        }
    ]
}
Step 3:
Now will create a subscription from SNS—>SQS
We will browse to the SNS topic we created and will create a new subscription in SNS with the following configuration where the topic ARN and Endpoint will automatically pop up since we have already created the SNS topic previously . Once you have entered the details, we will click on create subscription.

We will now publish a message to SQS:
We will go to our topic we created in SNS and click on publish message as you can see in the screenshot below:

On the publish message page i have entered the following details as you can see in the picture below:
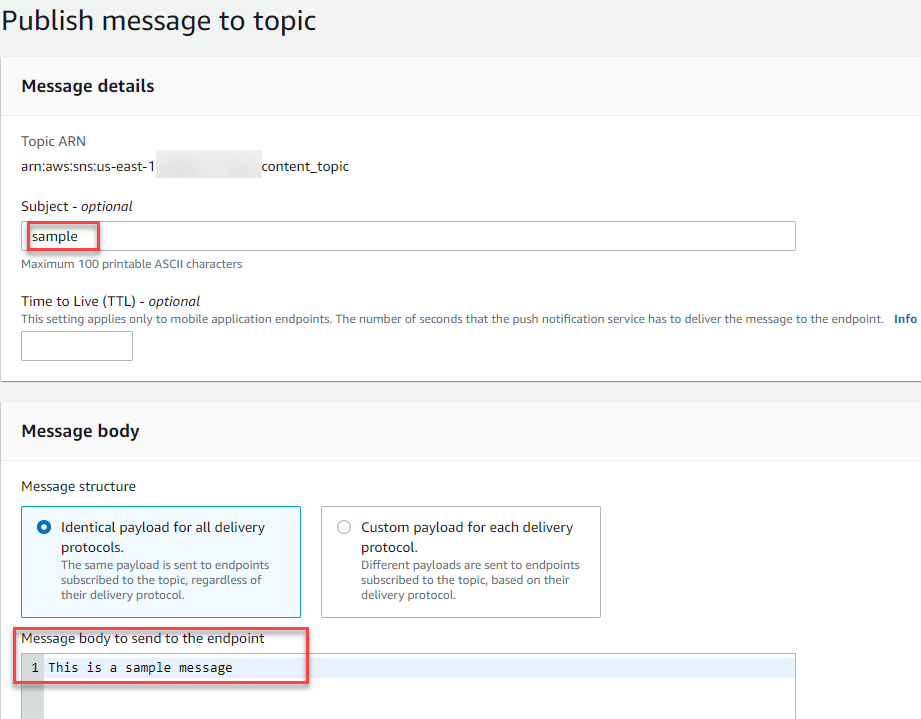
Under the Message attributes card, make the following changes – From the Type dropdown select String
For the Name field paste the following value – attr1
For the Value field paste the following value – value1
Click on the Publish message button
Step 4:
Now go to the SQS management console tab and you will be able to see the message there. As you can see below we have one message available.

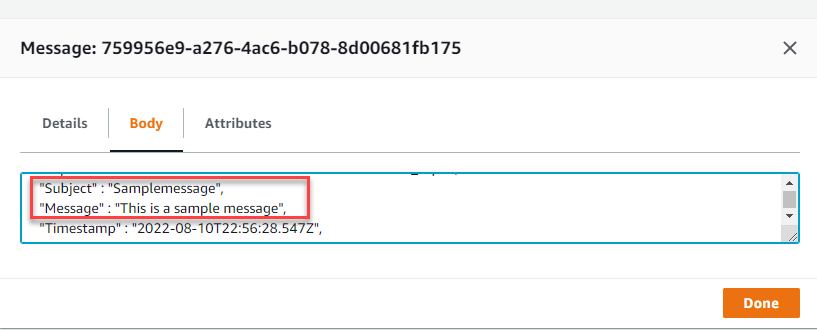
Once you browse to the SQS, you can poll for messages and see your message there with the message body. In normal use case scenarios , the application will fetch the message and we will hardly come to the console to check the messages.
For your reference this is the message you can see below:

Leave a comment